Wednesday, November 28, 2012

Pierogies with Potato, Mascarpone, and Caramelized Leek Filling


I love pierogies.

I had actually never had a pierogi until I met my husband (way back in my impressionable teenage years :) ) .  Potatoes in every conceivable guise from dumpling to latke to warm German salad, yes...pierogies, no. I had no idea those brilliant Eastern Europeans were stuffing delicious ravioli-type jewels with lovely fillings like like mashed potatoes and cheese, gently boiling and/or frying them, and carbo-loading to their heart's content. And lo, though I have been enjoying pierogies for many a year now, I've never actually tried to make these pillows of tastiness myself.

Until now.

Flash forward to Thanksgiving 2012. Since we never seem to be able to cook for the actual number of people we have, we had an absolute ton of Mascarpone Mashed Potatoes with Caramelized Leeks left over (along with everything else !) We tried for days - truly, a valiant effort - but in the end, we just couldn't get through all those damn potatoes. The last of our turkey got turned into Turkey Tetrazzini and frozen for Turkey Barley Soup...and those dishes even make clever use of all the other vegetables and the gravy. But what to do with the delicious, delicious potatoes ? Shepherd's pie was out, and I really don't like frozen potatoes (they have a weird aftertaste). And, of course, my frugal Scots side rebelled against just throwing them out. And then it finally hit me - pierogies were basically filled with mashed potatoes, right ? Well, if regular pierogies were good, then ones stuffed with oh-my-god-to-die-for mashed potatoes would be AWESOME, right ? So what if I'd never made a pierogi in my life ? That's what the internet is for !


Oh, thank you thank you THANK YOU, internet. I found myself a great-looking, easy to follow pierogi dough recipe and set out to make myself some pierogi. I mixed and rolled, cut and stuffed, folded and crimped and froze. And a few days later, we were able to pull a bag of homemade pierogies from the freezer and cook them up. And readers, let me tell you...from now on, whenever I make mashed potatoes, I'm definitely making enough that I'll have leftovers for this fantastic, fantastic dish. These things were so easy...and so, so, SO good...,hopefully I'll never buy frozen ones again ! (No offense, Mrs. T).

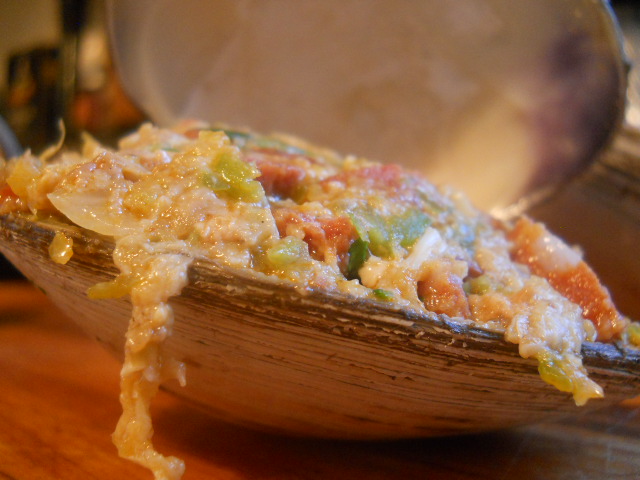
A few notes on preparation : one, you definitely do not need to make the same mashed potatoes we did - your favorite recipe will be just fine, though I do recommend mixing in some mascarpone, cream or farmers cheese and a little bit of cooked onion before using for pierogi filling (as much as you like - nothing needs to be exact here ! ). Two, make sure you really stick with about a tablespoon of filling in each one of these - any more, and your pierogi will be too thick. Three, pierogies freeze extremely well (even though they contain potato) - the trick is to freeze them individually, spread out out on cookie sheets. Once they are completely frozen you can pile them all in a bag and they won't stick together. Just take out as many as you need - no need to defrost before cooking. And four, pierogis are great just boiled with butter and/or sour cream, but if you brown them on both sides in a little butter with some onion they're even better - definite Culinary Orgasm !

Pierogies with Potato, Mascarpone, and Caramelized Leek Filling


Each batch of dough makes about 12-15 pierogies, depending on size - can be very easily doubled

Dough
(adapted from About.com)

2 cups flour, plus extra for kneading and rolling dough
1/2 teaspoon salt
1 large egg
1/2 cup sour cream
1/4 cup butter, softened and cut into small pieces
 
1 cup leftover Mascarpone Mashed Potatoes with Caramelized Leeks (recipe follows), or your favorite mashed potatoes)

To prepare the pierogi dough, mix together the flour and salt. Beat the egg, then add all at once to the flour mixture. Add the 1/2 cup sour cream and the softened butter pieces and work until the dough loses most of its stickiness (about 5-7 minutes). You can use a food processor with a dough hook for this, but be careful not to overbeat (my Kitchen-Aid with dough hook took about 3 minutes to get it all together.)Wrap the dough in plastic and refrigerate for 20-30 minutes or overnight; the dough can be kept in the refrigerator for up to 2 days.

Roll the pierogi dough on a floured board or countertop until 1/8" thick. Cut circles of dough (3 to 3 1/2 inches is ideal - we used biscuit cutters, but round cookie cutters or even a drinking glass would work well) . Place a small ball of filling (about a tablespoon) on each dough round and fold the dough over, forming a semi-circle. Press the edges together with the tines of a fork. The pierogi can be frozen at this point (see above), or cooked right away.

When you're ready to cook them, bring a large pot of salted water to a boil and drop the pierogies in. Boil them gently for 8 - 10 minutes (a little longer if frozen), or until a tiny bit of the doughy part doesn't taste like raw dough. Drain them well, and either serve right away or brown them for a few minutes on each side in a frying pan with a bit of butter - and a little chopped onion, if you're game...

Mascarpone Mashed Potatoes with Caramelized Leeks
(Makes more than you need for this recipe !)

2 leeks, cleaned and sliced into rings
1/2 stick butter
3 pounds baby potatoes (white or red), skin on and scrubbed
2/3 milk or half and half
1/2 cup mascarpone cheese
salt and pepper to taste

Melt the butter in a good-sized saucepan, and add the leeks. Cook over low heat, stirring occasionally, until the leeks are golden brown. (If they seem to be drying out, add a splash of water or white wine). 

While the leeks are caramelizing, place potatoes in a large pot and cover with lightly salted water. Bring to a boil, drain, and add back to the pot with the mascarpone and milk or cream. Mash to desired consistency, and stir in the cooked leeks. Add salt and pepper to taste.


Monday, October 8, 2012

Pflaumekuchen (German Plum Cake)


Plum Cake...mmm, plum cake...how I love plum cake season !

Plum cake is another one of those things that I grew up eating, courtesy of my good German heritage. There would come a time in the fall when you'd start to see the small plums called Italian or prune plums -  little dark purple oblong jewels, smaller than standard plums, firm and juicy sweet-tart. As soon as those little babies showed up, you knew it was high time to get your butt over to Oma (my great-grandmother)'s house - for there was bound to be plum kuchen.


Oma's kuchen was a thing of beauty. Made in a good-sized baking pan, it had a lovely golden base with neat rows of plums marching down the length of it. Not exactly cakey or bready or pie-crusty, but somehow a delicious combination of all three - with lots of plummy goodness in each square. Oma would offer you a cup of tea or coffee, and you'd sit there with your cake, chatting with one of the most special people on earth - who somehow always knew just the right thing to say to you - and you would think that you were the luckiest person in the world. I never did find out the secret of the plum cake, though...I wish I had asked, about that and so many other things.

Four generations of German awesomeness...that's me in the middle, Oma on the right.
Sadly, there is no plum cake in front of me !
I have been on a quest to recreate the plum cake for many years now, and have made some very fine cakes along the way...none of them quite like Oma's, though. Many of the recipes I found called for a yeast dough, which somehow seems wrong - I mean, I'm sure they're perfectly nice cakes and all, just not what I was looking for. Some recipes had the plums sunk way down into the cake, which again might be delicious - but I was adamant, I wanted my plums on top. The other thing that kept popping up in recipes was almonds...and I knew I didn't want almonds.

Until I found this cake.

This cake broke all kinds of my rules - it involved not only almonds, but a glaze - and it was made in a tart pan. Definitely not what I remembered from Oma's kitchen. But the darn thing just looked so good...the plums were gorgeous, and the crust looked and sounded like the golden deliciousness that I remembered. And it looked easy...not that I don't love me a dessert challenge, but there was football to consider. So I went to Russo's, and bought my plums, and mixed my batter and crossed my fingers. And oh my god, what a cake. This thing was Plum Perfection - buttery crust, sweet-tart plums...so good it brought tears to my eyes. And it was in fact super easy - one of the great things about a tart like this is that it looks so impressive, with the lovely swirl of plums...it's really dead easy to do. Start on the outside edge, lay a plum slice down with the tip towards the outside, then add another slice and slightly overlap...work your way around the outside until you get back to Plum #1. Start another circle inside that one, and so on.  A removable bottom tart pan is definitely a good investment - you can get a fine one for under $10 (Christmas Tree Shop is a great place to look). You'll find yourself using it for all sorts of tarts, savory as well as sweet...and the best part is that most tarts require no rolling, just pressing into the pan. What comes out is so professional looking, everyone will think you're a pastry chef. Which, of course, you are :)

No, this isn't exactly Oma's kuchen...but she would have loved it, I am sure. And maybe that's what she was really trying to tell me...to trust my instincts and take my chances. And if you make it with love, they will come to the table. Thank you, Oma.

A note on the plums : this cake will work fine with regular plums...they are harder to pit, though. Choose small ones if using standard plums - ripe but still firm (not mushy).


Pflaumekuchen (German Plum Cake)
adapted from the Boston Globe

Butter (for the pan)
1⅓ cups flour
½ teaspoon baking powder
½ cup (1 stick) unsalted butter, at room temperature
⅔ cup granulated sugar
1 egg
¼ teaspoon vanilla extract
12 prune plums (or 8 regular plums), halved, pitted then sliced about ½ inch thick.
2 tablespoons sliced almonds
 ½ cup apricot preserves
Sweetened whipped cream (optional)

Set the oven at 350 degrees. Butter a 10-inch tart pan with a removable base.

In a bowl, whisk the flour and baking powder. In another bowl, cream butter, granulated sugar, egg, and vanilla with an electric mixer until blended. Gradually add the flour mixture into the butter mixture and combine until all the flour is incorporated. Transfer the mixture to the tart pan (it will be crumbly) and with lightly floured fingers press evenly onto the bottom and sides of the pan. Arrange the plums, cut sides up, in circles on top.

Bake for 35 - 40 minutes or until the crust is golden brown. Leave the oven on to toast the almonds (below), and set the tart on a wire rack.

In a small baking dish, toast the almonds, turning often, for 10 minutes or until they are lightly browned. Keep an eye on them – they can burn quickly !
In a small saucepan  heat the preserves, stirring constantly, until they comes to a boil. Spoon the preserves over the tart (brushing with a pastry brush if you have one - makes it easier to get each plum).  Scatter the almonds on top.


Serve with whipped cream (optional)

Wednesday, October 3, 2012

Tartiflette with Brie and Bacon

aka the "potato bacon brie sex thing"
Yes, we're back ! This post brought to you by fortuitous shopping choices and a healthy dose of Google :)

Fortuitous Shopping Choice #1 : the boy has developed a rather delightful habit. He has decreed that anytime we hit the cheese counter at Russo's (or any other place with a good variety of fine cheeses) that we must try a new cheese...or new to him, anyway. Last week's selection was a rather pungent Brie de Meaux - and by "pungent" I mean "way too strong to eat on a cracker for a cheese virgin".  A little too much even for a committed cheese addict like me...so back to the fridge it went, vague thoughts of jamming, pastry wrapping and baking trailing behind.


Fortuitous Shopping Choice #2 - 5lb bags of potatoes were "buy one get one free" this week at Stop + Shop. I mean, why wouldn't you get the free one ? Potatoes never go to waste around here !


Which brings us, of course, to Google. Turns out you can find all sorts of interesting things when you type "Brie" and "potato" into Google. The one that immediately grabbed my interest, of course, also involved the words "bacon" and "creamy". Seriously, does that not just scream "Culinary Orgasm" ? The website I ended up on was for Waitrose, which is apparently a grocery chain in the UK. The website has a really great-looking recipe section which I plan to explore thoroughly.

Thus was my introduction to the tartiflette. Tartiflette is the most lovely French dish of potatoes, cheese, bacon (or lardons) and cream...that I had never heard of in my life. Why have I been denied this deliciousness ? It's like the best scalloped potatoes you've ever had in your life, except by invoking the words "scalloped potatoes" I fear I may scare off people of a certain age that were tormented by Betty Crocker boxed monstrosities in their youths. Friends, do not fear the Tartiflette...this is truly Culinary Orgasm material. It was a bit tricky translating the Brit measurements (and then of course adjusting the proportions as needed), but your intrepid blogger persevered...and thus I present my version of this dish.

A note on the cheese - traditional Tartiflette calls for Reblochon cheese, which is tricky to find (I may search it out now for comparison purposes, though). Brie - particularly Brie de Meaux - works beautifully. Do use the entire Brie, including the rind - it's perfectly edible, and is perfect in this dish as it just melts into the cream. I was a tiny bit short of the required amount of Brie, so I threw in a bit of one of my all time favorite cheeses - Sottocenere al Tartufo, or truffle cheese. I knew the truffle cheese would play very well with Brie (exhibit A : the ethereal fondue from Sprigs, recreated here ), but this exceeded even my expectations - it was sooooo good with the potatoes and bacon that I am calling for a tiny bit of truffle oil in the recipe (only a tiny bit though...truffle oil abuse is a terrible crime). If you don't have or don't like truffle oil, by all means leave it out - this dish will still absolutely rock without it.

One other note on the Brie...a ripe Brie is super hard to cut as it's so runny. If yours is lusciously oozing all over the cutting board, do yourself a favor and stick it in the freezer for 15 minutes or so before you try and cut it. Way easier !

We served this with ham and spinach, but really it would make a lovely meal all by itself..happy cheesy potato bacon goodness !


Tartiflette with Brie and Bacon
Adapted (and translated) from Waitrose
Serves 6

2 tsp vegetable oil
8 oz bacon (thick cut if possible), cut into small cubes
1 large onion, thinly sliced
2 good-sized sprigs of fresh thyme
1 cup (8 oz) heavy or whipping cream
1 cup (8 oz) whole milk
1 clove garlic, crushed
1/2 tsp truffle oil (optional)
Fresh ground black pepper
2 1/2 pounds potatoes, scrubbed well (but not peeled), thinly sliced
9 oz Brie, cut into small slices or cubes

Preheat the oven to 350°F, and lightly grease a 2 quart ovenproof dish.

Heat the oil in a frying pan and fry the bacon 4-5 minutes until beginning to brown. Add the onion, and cook for another 5 minutes or so until the onion starts to brown as well.

Chop the thyme leaves, reserving a few to garnish. Place the thyme, cream, milk and garlic in a large pan. Bring to a simmer, add the potatoes, then cover and cook for 5 minutes. Stir in the bacon-onion mixture and the truffle oil (if using) and season with freshly ground black pepper. Spoon half the potato mixture in the base of the prepared dish, then top with half the sliced cheese. Repeat, finishing with a layer of cheese.

Bake in the oven for 40-45 minutes, until the potatoes are tender when pierced with a knife and the top is golden. Let sit at least 10 minutes before serving.


Monday, July 30, 2012

Grill-Baked Stuffies


Yes, we're still cooking over here :) Doing a lot of other stuff too, but we're always cooking !

One of the "other stuff" things we did recently was to check out the Tall Ships in Boston, which was very cool (would have been even cooler to see them under sail, but even sitting in the harbor they are pretty damn impressive).

boats !
We capped off our trip with a stop at The Barking Crab , which I hadn't been to in years (and my partners in crime had never been to.)  A little touristy, but it was definitely good to get off our feet - it's a spot with a fun vibe and plenty of choices for everyone from crazy foodies like us to picky out-of-towners. And, they had stuffies !!

here's the Barking Crab version
What are stuffies, you ask ?  Stuffies are a New England (Rhode Island, actually) version of stuffed clams - quahogs, to be precise, great big clams that are usually used for chowder. Lightly steamed until they give up their sweet meat, which is removed and mixed with chorizo and Portuguese sweet bread crumbs. The whole lot is stuffed back into the shells and baked into absolute deliciousness.

Happy as a clam...in beer !


ready to stuff
waiting for foil
We started off with an Emeril recipe (original here ), but of course tweaked it quite a bit...I mean, really, this is us here :). Steaming in beer and using the sweet bread were the big changes, but there were some other things too...it's fun to play with recipes, and Emeril's usually adapt really well - though I refuse to make "Essence" (seriously, what a ridiculous name.) We also wanted to do these on our grill instead of heating up the house, which worked perfectly - just make sure you know how to keep a constant temperature with your grill.


The stuffies were absolutely delicious, but the recipe actually needs a tiny bit more tweaking (basically less chorizo and a drier stuffing), and we are definitely looking forward to perfecting this one in the very near future. In the meantime, I'm going to give what we think the final recipe will be...if it changes, we'll be sure to let you know !


Stuffies
Heavily adapted from Emeril Lagasse

Ingredients

8 large quahog or chowder clams
1 beer (12 oz), whatever you have around
1 – 2 sprigs fresh thyme
4 tablespoons butter, at room temperature
3 tsp minced garlic, divided
Salt and pepper to taste
4 ounces chopped chorizo sausage
1/2 cup minced onions
1/4 cup minced celery
1/4 cup minced peppers – green, red, or a little of both
1 tsp Old Bay seasoning, or more to taste
1 cup dried bread crumbs, made from Portuguese sweet bread if possible *
3 tablespoons chopped fresh parsley, divided
1/4 cup reserved steaming liquid
1/4 cup grated Parmesan cheese

Directions  

Pour beer into a large pot that will hold the clams in a single layer if possible. Add the thyme and 2 tsp of the garlic, and bring to a boil.  Add the clams to the pot, cover, and steam for about 6 to 8 minutes or until the shells open. Discard any shells that do not open. Remove the clams from the pot and place on a parchment-lined sheet pan. When the clams are cool enough to handle, gently pry the shells apart enough to remove the clam, leaving the hinge attached. Loosen the muscle in the lower shell and remove the clam from the shell. Set aside the 6 nicest shells.  Finely chop the clam meat and set aside.

While the clams are steaming, in a mixing bowl stir the butter, remaining garlic, and 1 tablespoon of the parsley together. Refrigerate while you finish the clams and stuffing.

Heat a sauté pan over medium-high heat. Add the chorizo and cook until rendered, about 2 minutes. Add the onions, celery and peppers. Season with Old Bay and cook for 2 more minutes. Stir in the remaining garlic, the breadcrumbs, and reserved clam meat and remove from the heat. Stir in the reserved cooking liquid and the rest of the parsley. Add more Old Bay if needed and cool slightly.

Pack the stuffing mixture into one side of each shell. Using your hands, pat the stuffing firmly into each clam shell.  . Place about a tablespoon of the garlic butter on top of each stuffing mixture, then top each evenly with the cheese.  Close the shells as tightly as possible and wrap with aluminum foil.

Preheat the oven or grill to 400 degrees F.  Bake for 15 to 20 minutes. Unwrap the clams and serve hot.


*Portuguese Sweet Bread is pretty easy to find in New England – if your market sells rolls individually it’s really easy to just buy one or two rolls. To make dry bread crumbs, toast slices of the bread or rolls in a 300 degree oven for 15-20 minutes until nice and dry, then grind them up in your food processor.  If you don’t have easy access to sweet bread (or really don’t feel like making your own bread crumbs), just use regular bread or plain bread crumbs.  Your stuffies will still rock !

Saturday, July 14, 2012

Spicy Baked Beans with Chorizo


I have a confession to make.

I really don't like baked beans.

I know, it doesn't make sense to me either. I love beans. LOVE them.  White beans, black beans, frijoles...I make (and eat) beans all the time, and I never get tired of them. And I absolutely adore cassoulet, which is basically a French version of baked beans with plenty of meat. But there is something about regular baked beans that just turns me right off.

When I was a kid, summers with my relatives in Maine meant a lot of traditional New England fare - which of course included hot dogs and beans with brown bread on Saturdays. I would eat as much brown bread as I could get, and a hot dog or two was okay as long as there was plenty of mustard involved. But I could really never get the beans down - and I was not by any stretch of the imagination a picky eater. I loved absolutely everything else they threw at me. Fried mackerel ? Oh hells yes !  But the beans...too sweet, too mushy, and not much flavor...really, just nothing to redeem them, particularly if there was brown bread left that needed eating :) I would push the beans around on my plate, delaying as long as possible - then slip them to Sput (the dog) when no one was looking.

Wow, I feel much better getting that off my chest. Confession really is good for the soul !

It was only when I got older and more experienced that I realized that homemade baked beans could actually be pretty tasty. I still don't like the ones that try to replicate the canned flavor (to me, I can't imagine why anyone would try and replicate that !), but there are some baked beans that make for very tasty eating. It's taken me a while to find a recipe that I really love, though - and one that I wanted to share with my readers. This is definitely The One.


This is another of my adaptations of a Cooking Light recipe (original here) . There's nothing wrong with Cooking Light recipes, though I know that it seems I adapt them all the time. What happens is I see something in the magazine or on the website that gets my wheels turning - but of course, my wheels turn a little differently than most :) Here, for example, I knew I wanted to use our bean pot (picture at top), which I loved the idea of when we got it but has ended up being mostly a decorative element since we received it as a gift many, many years ago. I also knew I wanted different spicing, including "blooming" the spice a little (basically toasting them in oil, which does beautiful things to them)...well, you see where this is going. And where it went !

One idea I kept (and loved) from the original was the use of chorizo instead of salt pork, which is the traditional flavoring for baked beans. There's nothing wrong with salt pork - I always have some around for chowder making, or to render for other nefarious pork fat schemes. But chorizo and beans...mmm, definitely a match made in heaven. Chorizo, for those unfamiliar with it, is a lovely Spanish sausage, redolent with rich pork and the warm flavor of paprika. There are two basic versions of chorizo - one is a dry sausage similar to a pepperoni, which can be eaten as is. The other is a fresh version (usually Mexican or Portuguese in origin), closer texture-wise to Italian sausage which must be cooked before eating. Most supermarkets carry the fresh version, but this recipe called for the dry one which I was able to find at Russo's.


The fresh version would probably work, but you'll want to cook it a little longer before proceeding with the recipe - and you should drain some of the fat before  moving on, as well. Love the pork fat and all, but you want to be able to taste the beans here too !

One last note I want to add here is about the spices. You'll notice that I swapped in dried spices for the fresh...no, I'm not crazy and yes, I absolutely love fresh spices and use them whenever I can. But for hours-long cooking with beans, I've found that the dried actually hold up much better than the fresh. I've also included two somewhat harder to find items - smoked salt and smoked paprika. My stash came from Christina's in Inman Square (sadly, no website) but I realize not everyone is as...insane as I am when it comes to kitchen stocking (though I have noticed that more supermarkets are stocking at least the smoked paprika). By all means, feel free to make this dish with regular salt and paprika (though the smoked stuff is really good and useful in all sorts of dishes). It will still be super yummy....definite Culinary Orgasm !

The rest of dinner, clockwise from left  - andouille, cornbread, beans, cucumber salad. Middle of plate : brisket 


Spicy Baked Beans with Chorizo  

1 pound dried Great Northern beans (2  1/2 cups)
1 dry-cured Spanish chorizo, diced (about 8 oz)
4 cups chopped onion
4 – 6 garlic cloves, minced
1 tsp dried oregano
1 tsp dried thyme
1 tsp salt (smoked, if you have it) 
1 tsp ground cumin
1/2 teaspoon smoked paprika
1 teaspoon regular paprika (swap in some hot paprika if you have it and you want things spicier)  
1 bay leaf  
1 ½ cups beer ( 12 oz)
1 ½ cups water , plus extra to cover beans if needed
2 tablespoons brown sugar
2 tablespoons tomato paste
2 tablespoons molasses
2 tablespoons ketchup  
2 tablespoons red wine vinegar


Soak beans overnight in accordance with package directions (or use quick-soak method on bag.) Drain; do not rinse.

Heat a large Dutch oven over medium heat. Add chorizo; cook 4 minutes or until fat begins to render. Add onion and garlic; sauté 10 minutes or until tender. Add oregano, thyme, salt, cumin, paprika(s) and bay leaf; stir in with onions  and cook for a few minutes, stirring frequently, until you can really smell the spices. Add beans, beer and water - adding additional water if needed so the liquid just barely covers the beans - and bring to a boil. Cover, reduce heat, and simmer 45 minutes or until beans are just tender.

Preheat oven to 300°. Stir brown sugar, tomato paste, molasses and ketchup into bean mixture.  Cover (or transfer to bean pot);  bake at 300° for 4 hours or until beans are very tender and sauce is thick. Remove from oven; stir in vinegar and serve.


Monday, May 28, 2012

Tequila-Citrus Mahi Mahi with Mango Pico de Gallo...and a whole lot of other stuff !

Tequila-Citrus Mahi Mahi with Mango Pico de Gallo

Wow, I almost went a whole month there without a blog post ! Can't let that happen :)


clockwise from left : Corn with Chipotle-Lime Butter, Salt Potatoes, BBQ Pork Neck, Tequila-Citrus Mahi Mahi with Mango Pico de Gallo, Oma's Cucumber Salad.


It's not that we haven't been cooking (or eating) ...just been a busy few weeks, and when we get like that we tend to stick with things we know...things you've already read all about, and we definitely don't want to bore anyone ! Sooner or later, though, the urge to get busy in the kitchen (or the backyard) takes over, which was the case this weekend. The weather was kind enough to cooperate, and we had ourselves quite the grill fest yesterday. Of course, us being us, we couldn't do the traditional hot dog-burger-tater salad type of Memorial Day barbecue...not that there's anything wrong with that, of course - we've done it plenty of times. This time, though, we just had to get our foodie on - so we headed to H Mart. Ahh, gotta love H Mart...have written about it a few times before, it's an amazing Korean supermarket where you can get the most wild and crazy Asian ingredients you can think of and pretty much every type of protein and produce known to man...some of which you've never even dreamed about. (I'm still trying to figure out what one would do with pork uterii).

chicken legs and pork neck mmm mmm good !
We picked up some gorgeous chicken legs, some pork neck (which is going to get a separate blog entry - it was that good, and that much of a revelation), and some mahi mahi. One of the best things about H Mart is that it has the largest fish counter I have ever seen, everything from live fish tanks to salted/smoked/pickled/whatever you could possibly do to a fish. And we hadn't made mahi mahi in ages....so into the basket it went.

Oddly enough, even though we were at H Mart, we didn't want Asian-style fish - so I wandered back to to produce department with vague thoughts of lemon-lime type marinades in my head. And then we saw the mangoes...


At our first Facebook Foodie Freakout , Mark and I started strong with an amazing Coconut Ceviche with Mango Pico de Gallo...I've blogged about it here ; it is really a fantastic dish and totally something to impress your party guests with. Ceviche starts with a citrus marinade as well, so I thought the Mango Pico de Gallo would go really well with the fish marinade that I was making up in my head....the extra little punch I was looking for. Ohhh baby...yeah, that definitely worked !! Together, definite Culinary Orgasm....full of fresh, bright, yummy flavors. Pico de Gallo (which means "rooster's beak" in Spanish) is really just a fresh salsa - a little less liquid than regular salsa, and easily adaptable to all sorts of ingredients. Super easy to make...there's no cooking, just chopping. Do use gloves if you are working with hot chili peppers, though - your eyes (and other parts) will thank you later !

Following is the recipe for the fish, and at the end are links to some other recipes. I promise, I really will get to the pork in another entry...the only other thing we need to talk about is the chicken. This is all Mark, and here is what he has to say :


chicken ready for the grill


"The rub I used on this was Grill Mates Cowboy Rub. If you can put the rub on the night before it's better, but let it sit on there at least a few hours before cooking if you can.  Build a small coal fire on one side of the grill. Place the chicken on the other side and close the cover. Have your wood chips soaking on the side...a least a half hour to start. Throw handfuls of wet wood chips on the coals every 15 minutes or so, or when they stop smoking. This chicken took about three hours at a temperature of about 220 - 250 F. You may need to add more charcoal to keep the temperature up."

the Grill Master !!


Tequila-Citrus Mahi Mahi with Mango Pico de Gallo

4 pieces mahi mahi , about 6 ounces each

Citrus-Tequila Marinade

 2 shallots, minced
1/4 cup chopped fresh cilantro
1/4 cup fresh lime juice
2 T lemon juice
2 T orange juice
2 tablespoons olive oil
2 tablespoons tequila
salt (sea salt is really nice) and fresh ground pepper, to taste.

Whisk marinade together well (or my favorite - shake in a screw-top jar) and pour over fish. Let marinate about an hour (no more, or the citrus will "cook" the fish and you'll have ceviche ! ). Grill the fish over hot coals, 4-5 minutes per side or until done. Top with Mango Pico de Gallo.


Mango Pico de Gallo

2 cups diced mango
1 cup diced red onion
½ cup diced red bell pepper
½ cup diced poblano chilies
1 habanero chili, seeds and membranes removed, diced
¼ cup chopped fresh cilantro leaves
2 tablespoons orange juice
2 tablespoons lime juice
1 tablespoon honey
1 teaspoon kosher salt

Combine all ingredients well, and let sit in fridge at least an hour to develop flavors.

Other recipes on this menu :

Corn with Chipotle-Lime Butter


Salt Potatoes...blog coming soon; for now here's a good recipe : http://www.nytimes.com/2008/08/22/travel/escapes/22rNYfood.html


Sunday, April 29, 2012

Sister's Stew (from Game of Thrones), Culinary Orgasm style

a trencher of yummmmm

This post found inspiration in so many places, I hardly know where to start...

I discussed my family's love of the "Song of Fire and Ice" series (better known in TV Land as "Game of Thrones") in this post , as well as giving a brief history of trenchers. We've also discussed our love of fishing in a few places (notably here and here ).  So when a dear friend pointed me to an entire blog of recipes from the books via a recipe for this amazing stew, I had to check it out. The blog is fantastic, if you're a fan....it's called Inn at the Crossroads , named after a location in the books that's seen its share of drama. And the stew...oh, the the stew. The Sisters (in the books) are three islands - and apparently they make one heck of a stew :

“The beer was brown, the bread black, the stew a creamy white. She served it in a trencher hollowed out of a stale loaf. It was thick with leeks, carrots, barley, and turnips white and yellow, along with clams and chunks of cod and crabmeat, swimming in a stock of heavy cream and butter. It was the sort of stew that warmed a man right down to his bones, just the thing for a wet, cold night…”
-George R.R. Martin, Dance with Dragons

Pretty much says it all right there.

The recipe as written in the blog (entry here) really looked pretty fantastic (OT: it was actually a guest post from another blog about Diana Gabaldon's "Outlander"series - another one of my faves !). I made some minor changes, as I come from a long line of chowder makers and have some definite firm opinions about what goes in a good chowder . The changes include swapping in some potatoes for part of the turnips as I'm not the hugest turnip fan out there (though we had to keep some for authenticity), added some nutmeg and cloves as they were referenced in the book (again with the authenticity...plus they compliment the heavy cream so well), and some other minor changes. The biggest changes I made, though, were to start the vegetables in salt pork instead of olive oil (no self-respecting Down Easter would use anything but) and to swap our own excellent homemade fish stock for the water and clam juice.

veggies for stock

fish heads, fish heads, roly poly fish heads....


 Our stock recipe is at the end of this post...now, granted, if you're not a crazy fisher-person like the people who live here you may not have giant fish heads in your freezer...that's just how we roll :) You can sometimes find heads for stock making at your local grocery store or fish market, but if you don't see them, ask - they'll be able to recommend something.

Enjoy !


Sister's Stew
adapted from Inn at the Crossroads

1/4 lb salt pork, cubed
2 cups leeks, white & light green only (save the tops for the stock)
1/2 cup carrot, peeled & diced
1/2 cup celery, diced
1 clove garlic, minced
1/4 cup barley, uncooked
1/2 cup white wine
3 cups fish stock (see below)
1/2 cup diced white potatoes (or white turnip)
1/2 cup yellow turnip (rutabaga), peeled & diced
4  sprigs fresh thyme
1 cup heavy cream
Pinch of saffron
1/4 tsp ground nutmeg
1/8 tsp ground clove
1 lb cod or other white fish , in small chunks
1/2 lb crabmeat
1 cup clam meat, chopped if large
1/4 cup (1/2 stick) unsalted butter
Salt and pepper to taste


Fry salt pork in a large pot over medium heat until toasty brown and the fat has been released (this is called "trying out"). Remove salt pork from pan, but leave fat in there (you can drain the cubes on paper towels and retain for garnish if you like that sort of thing,, which we do...be warned the bits are very salty though !) Add the leeks, carrots and celery to the hot fat in the pot and sweat until tender, 5-7 minutes. Add the garlic and barley. Stir constantly until fragrant, about 2 minutes. Deglaze with wine and reduce until almost dry. Add the fish stock, potatoes, turnips and thyme. Increase the heat to medium-high and bring to a boil. Reduce to medium-low and simmer until the vegetables and barley are almost tender, 30 minutes. Remove the woody thyme stems and add the cod. Simmer for 5 - 10 more minutes, or until the cod is almost cooked,

Warm the cream gently in a small saucepan then add the saffron, rubbing the threads between your finger tips to break them up slightly. Add the nutmeg and cloves, then stir the cream into the stew. Add the crabmeat, clams, and butter . Cook for another 5 minutes, stirring gently once or twice, until the fish is done and and the butter is melted. Season with salt and pepper, and garnish each bowl with a few cubes of salt pork (if using. )

Serve hot with plenty of freshly ground pepper and black bread (or, if you really want to go for it , serve in hollowed out large rolls or small bread loaves)


Fish Stock
(loosely based on Jasper White's)

2 tablespoons unsalted butter
3 celery ribs, including leafy green tops, coarsely chopped
Dark green tops from 4 leeks, coarsely chopped
2 shallots, sliced
2 medium carrots, coarsely chopped
2 bay leaves
6 to 8 thyme sprigs
1/4 cup coarsely chopped flat-leaf parsley
1 tablespoon whole black peppercorns
2 - 3 good sized fish heads, rinsed well
1/4 cup dry white wine
6 cups  hot tap water
1 - 2 tsp kosher or sea salt, to taste

Melt the butter in a large saucepan. Add the celery, leeks, shallots, carrots, bay leaves, thyme, parsley and peppercorns to the saucepan and cook over moderate heat, stirring occasionally, until the vegetables are softened, about 8 - 10 minutes. Stir in the fish heads and the wine. Cover and cook, stirring occasionally, about 10 minutes. 

Add the hot water, stir gently and bring to a simmer over high heat. Reduce the heat to low and simmer gently for 30 minutes, stirring occasionally. Remove from the heat, stir once and let stand for 10 minutes. Strain the stock through a fine sieve. Season lightly with salt and let cool, then refrigerate or freeze until needed.

Note : Depending on the size and species of your fish, you may have some lovely meat left over when the stock is done - cod cheeks from a large cod are particularly tasty. Feel free to retain this meat and stir it into your final soup/stew/chowder/what have you...

Sunday, April 15, 2012

Spring Grill Fling : Shaker Smoked Chicken, Grill-Baked Potatoes with Sea Salt, Fresh Cracked Pepper and Rosemary, Celeriac Remoulade, Oma’s Cucumber Salad


It feels a little…well…guilty to be celebrating spring this year. Here in the Northeast, we really didn’t have much winter to speak of – well, any winter, actually. One snowstorm in October does not a winter make, not in the land where the Blizzard of ’78 is discussed like it was yesterday - along with the April Fools blizzard that had us thinking the Patriot’s Day Boston Marathon-Red Sox home game doubleheader was in jeopardy. This April, though, it’s sunny and almost 80 in my backyard as I write this – and I’ll take that any time. There’s always next winter to get my suffering back on :)

Today’s grill fest starts with a recipe I found ages ago for Shaker-style smoked chicken thighs (which I rediscovered when I was cleaning out my recipe box last week - that’s a process in itself. In addition to my zillion cookbooks, I have a box full of loose recipes dating back to when I was a kid. Every so often it threatens to take over the kitchen, and I have to reign it back in). I’m not sure what makes this “Shaker-style”, but when I saw it involved chicken thighs I knew I had to try it out. I love cooking with chicken thighs – they’re so much more flavorful and juicy than boneless skinless breast (that stuff is practically tofu…tastes like nothing until to you do something to it.) The meat is dark, but not dark enough not to scare off the dark meat haters. I use the thighs in all sorts of things, including my chicken and dumplings, and I haven’t had anyone turn them down yet. The original recipe from EatingWell.com called for boneless skinless thighs, so if you are really averse to using the thighs I do think the breast would work. I adapted this to use the bone-in, skin-on thighs as I like the juiciness you get from using the whole part.  It does take longer to cook this way, but I think the results are well worth it.
chicken on the grill
<><><><><><><><>
finished product
As for the side dishes, the potatoes are something I make for the grill all the time, and they couldn’t be simpler. Wash baking potatoes well, stab them all over with a fork, and lay them on some foil. Brush them with good olive oil, and sprinkle with a few grinds of pepper and a few shakes of salt. Tuck a fresh rosemary sprig in with them, and wrap them up tight.  They take about an hour at typical oven temperatures, but if you are smoking instead of grilling then they’ll take a few hours. You can tell they’re done if they give when you squeeze them.
ready for my closeup !
Oma’s cucumber salad is a traditional German dish that I grew up eating, though nowadays I think I have access to better cucumbers than Oma did! It’s basically a quick, fresh pickle – sliced cucumbers marinated in vinegar with a little salt, white pepper and sugar added. This basic marinade is also great with other vegetables – leftover green beans are awesome in it. My favorite cucumbers to use are the baby ones that I get at Russo’s, though a good English cucumber will work as well.
a bowl of goodness
yum !
That brings us to celeriac, or celery root - one of the weidest looking vegetables you will ever see. I wrote about celery root in my Oktoberfest post, but it's just so fun I have to write about it again.
seriously, look at that thing !!
The roots themselves are pretty scary looking, sort of alien potatoes with tentacles – but under that woeful exterior is one of my favorite food items ever, with a fresh, light celery flavor that compliments pretty much anything.The remoulade is something I’ve been dying to make ever since our friend Jonathan made it for our last Facebook Foodie Freakout. I grew up eating celery root – but in the German style, Selleriesalat (see the Oktoberfest post for the details.) Great stuff, but when Jonathan showed up with the remoualde I was intrigued. I knew that celeriac remoulade was a classic French dish, but I didn’t quite realize that it used raw, grated celery root. One bite, though, and I was hooked. A lemony, mustardy mayonnaise with that great celery root flavor and a wonderful crunch – sort of like the best version of coleslaw you could ever want to eat.


Yeah, I’m very okay with this whole celebrating spring thing – especially when it gives us an excuse to put on a meal like this one. BRING IT!! :)

Shaker Smoked Chicken
Adapted from EatingWell.com

½ cup cider vinegar
¼ cup olive oil
1 tsp kosher salt
2 large shallots, chopped
4 lbs bone-in, skin-on chicken thighs (or 2 lbs boneless skinless thighs, or breast)

Whisk marinade ingredients together (everything but the chicken), and pour over chicken in a large Ziplock bag or large bowl. Toss or shake to coat, and refrigerate for at least 30 minutes (a couple of hours is even better).  Smoke according to your smoker’s directions, or use a foil packet of soaked wood chips on your grill. Cooking time for bone-in is 1 – 3 hours, depending on how much heat you use. Grilling boneless chicken will only take about 6 – 8 minutes per side.

Grill-Baked Potatoes with Sea Salt, Fresh Cracked Pepper and Rosemary

For each person:

1 baking potato
2 tsp olive oil
1 tsp sea salt
½ tsp fresh ground black pepper
1 spring fresh rosemary


Wash potatoes well and prick with fork. Wrap in foil with remaining ingredients. Bake on the grill at 400F for an hour, or longer if you use a lower temperature.


Celeriac Remoulade
Inspired by Jonathan Klein


By all means, if you want to use homemade mayonnaise in this, go for it! Hellman’s, though, is mighty tasty and a lot less work.


1 ½ to 2 pounds celery root
1 tsp salt
3 tablespoons lemon juice
½ cup mayonnaise
1 tablespoon sweet pickle relish
1 tablespoon Dijon mustard
½ tsp white pepper
½ green apple, shredded or julienne cut


Wash, peel and trim the celery root. Grate using the largest holes in your food processor or box grater. Toss the grated celery root with the salt and 2 tablespoons of the lemon juice. Set this aside for about 30 minutes at room temperature. 

Meanwhile, whisk together the remaining ingredients (except the apple) until well blended. Stir in the apple and the celery root.  Taste and adjust for seasonings (salt? More mayo? More lemon? You be the judge!).  Let sit in refrigerator a few hours to blend the flavors, then serve.

Oma’s Cucumber Salad

There are two versions of this salad in Germany – a sour cream version, and a vinegar one. This is my version of the one my Oma made for us growing up.

6 - 8 baby cucumbers, or 1 large English cucumber
½ cup white vinegar
¼ cup water
1 tsp sugar
1 ½ tsp salt
½ tsp white pepper
1 tsp dill


We prefer the peel left on, but taste a bit to make sure the peels aren’t waxy or bitter – peel if needed. Slice cucumbers somewhat thinly (pickle sized slices are what you’re after).  Whisk together remaining ingredients, and pour over cucumbers. Let sit in refrigerator at least an hour before serving.